Week 03: Computer-Controlled Cutting
This week’s tasks were:
- Characterize the Dazu laser cutter’s kerf and cutting parameters using a comb test.
- Learn basic operation of the vinyl cutter and complete a simple cut.
- Prototype my "Fu + triangle screen" front panel for a future electronics box.
Introduction
This week, I started working more actively in Chaihuo Makerspace. Chaihuo is Shenzhen’s first makerspace, and I first heard about it nearly ten years ago during Maker Faire Shenzhen.
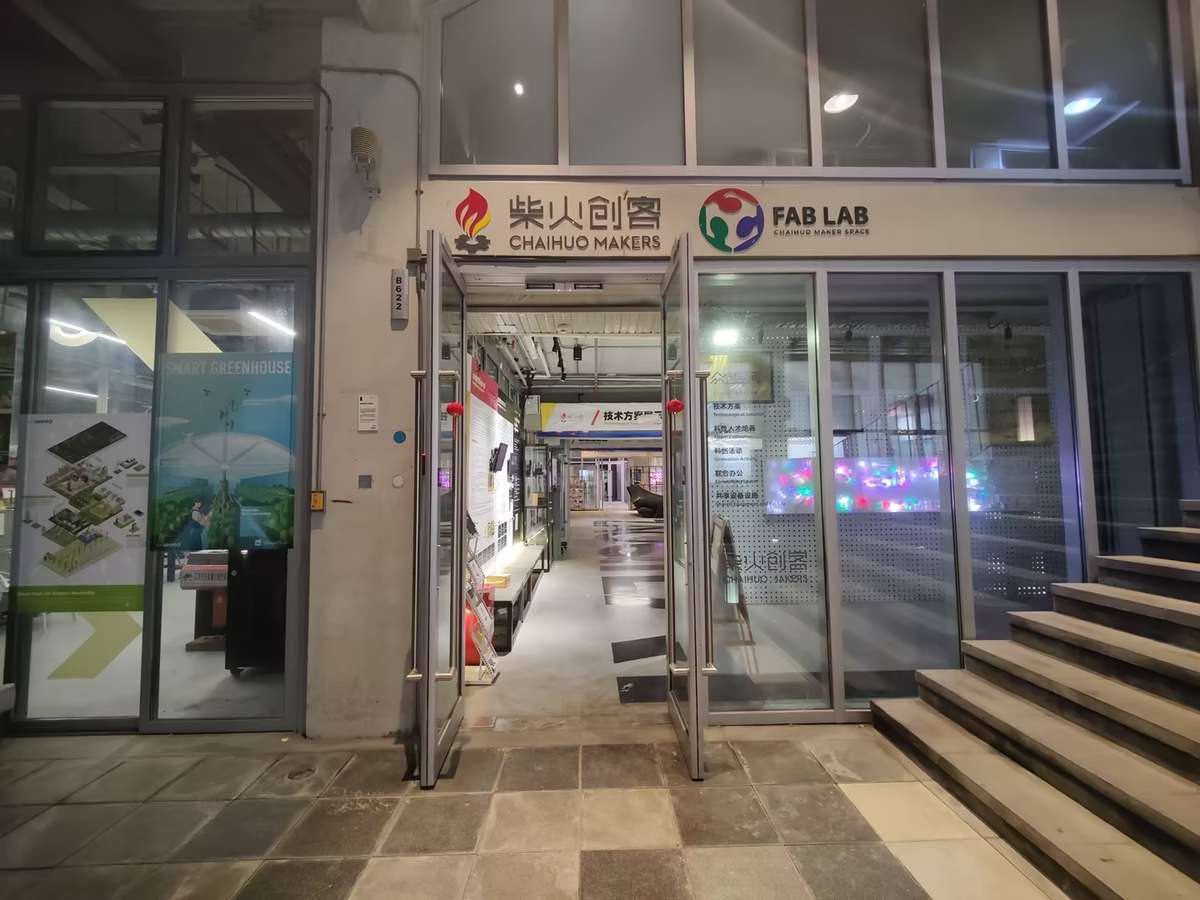
Today, it's still a dynamic hub with 24/7 access, it could use facial recognition to get entrance of the gate, and using smartphone-controlled lab lights, super convenient.
What excites me most is the ideas constantly emerge here through meetups and hackathons. Now it's my turn to build something here.
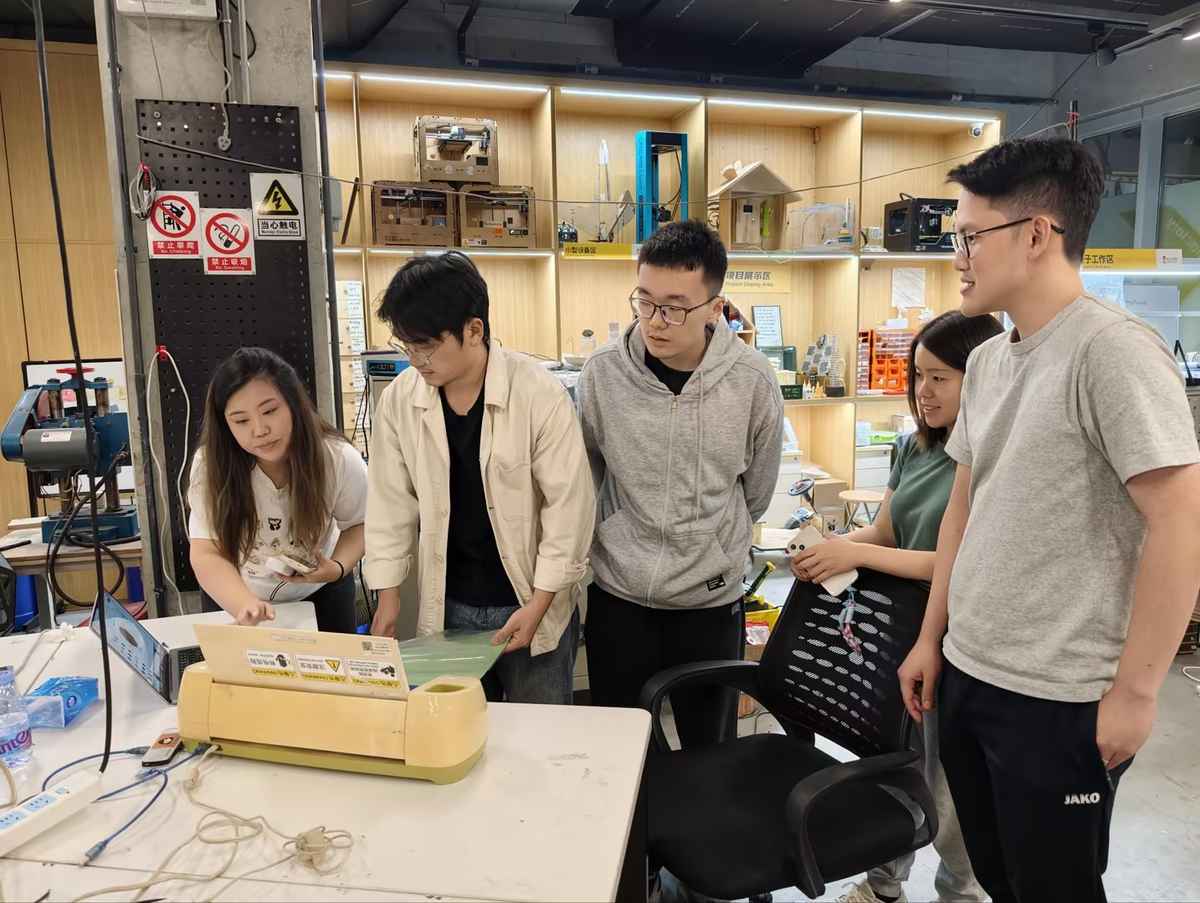
Group Assignment
Machine and Settings
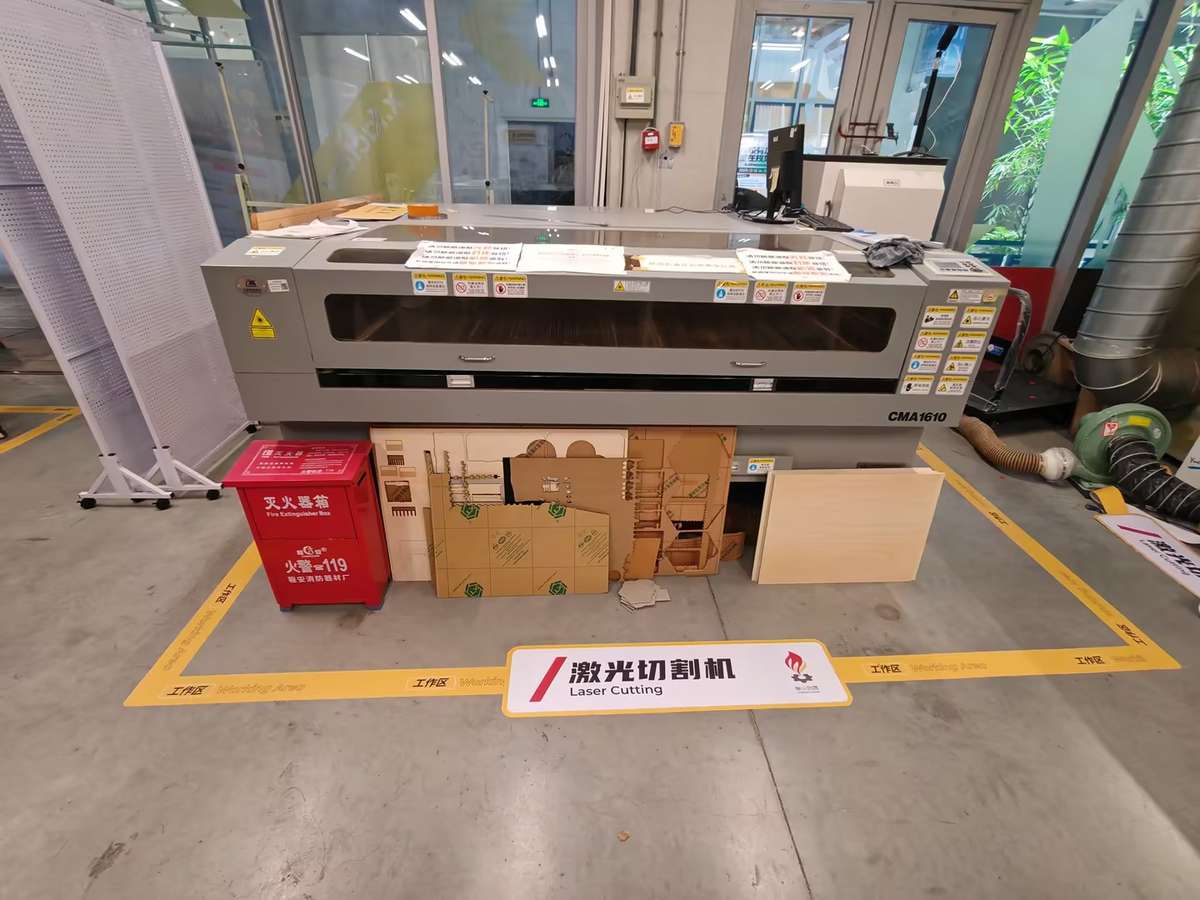
We used the Dazu laser cutter (software: SmartCarve 4.3) and tested on about 6 mm waste wood.

Steps:
- Review safety instructions and ventilation.
- Power on machine and exhaust.
- Place wood flat, focus laser head (using manual Z adjustment).
Cutting Parameters
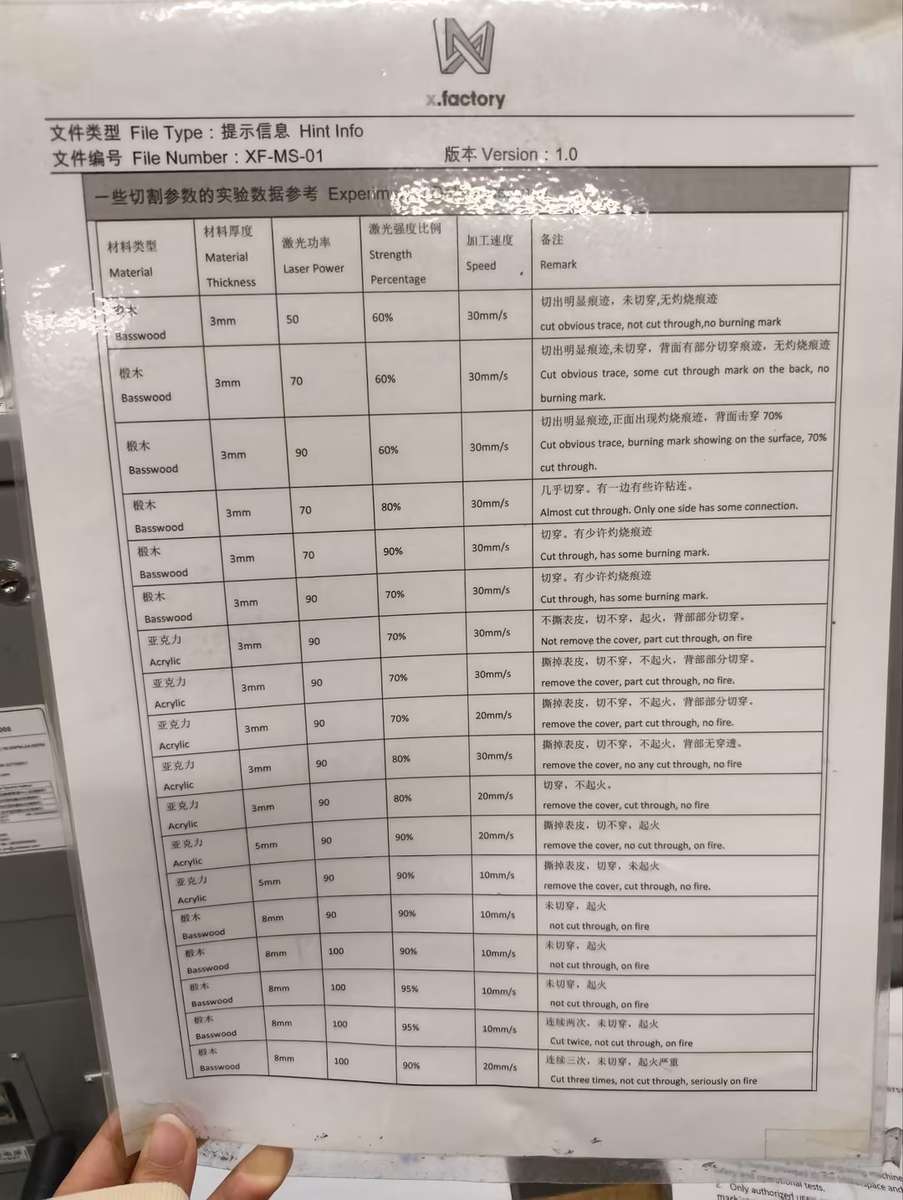
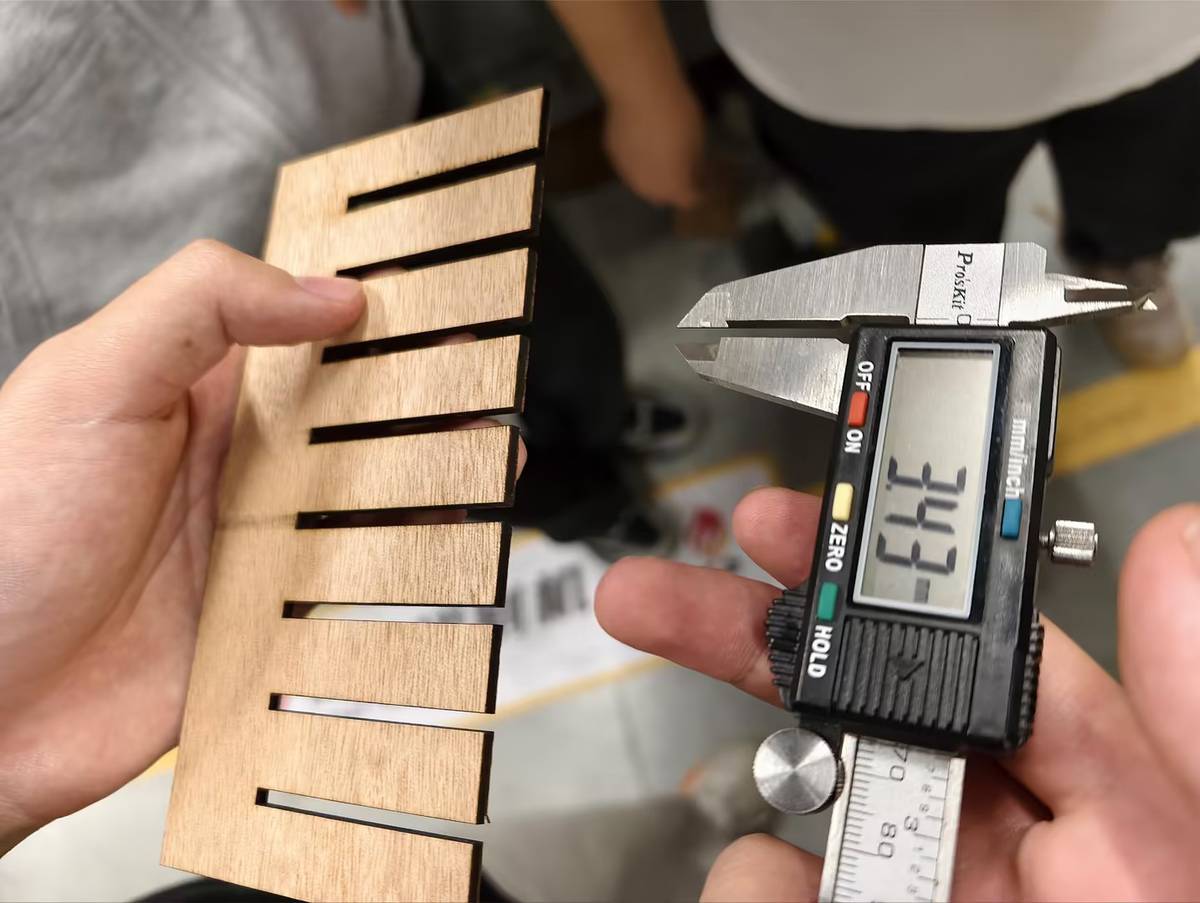
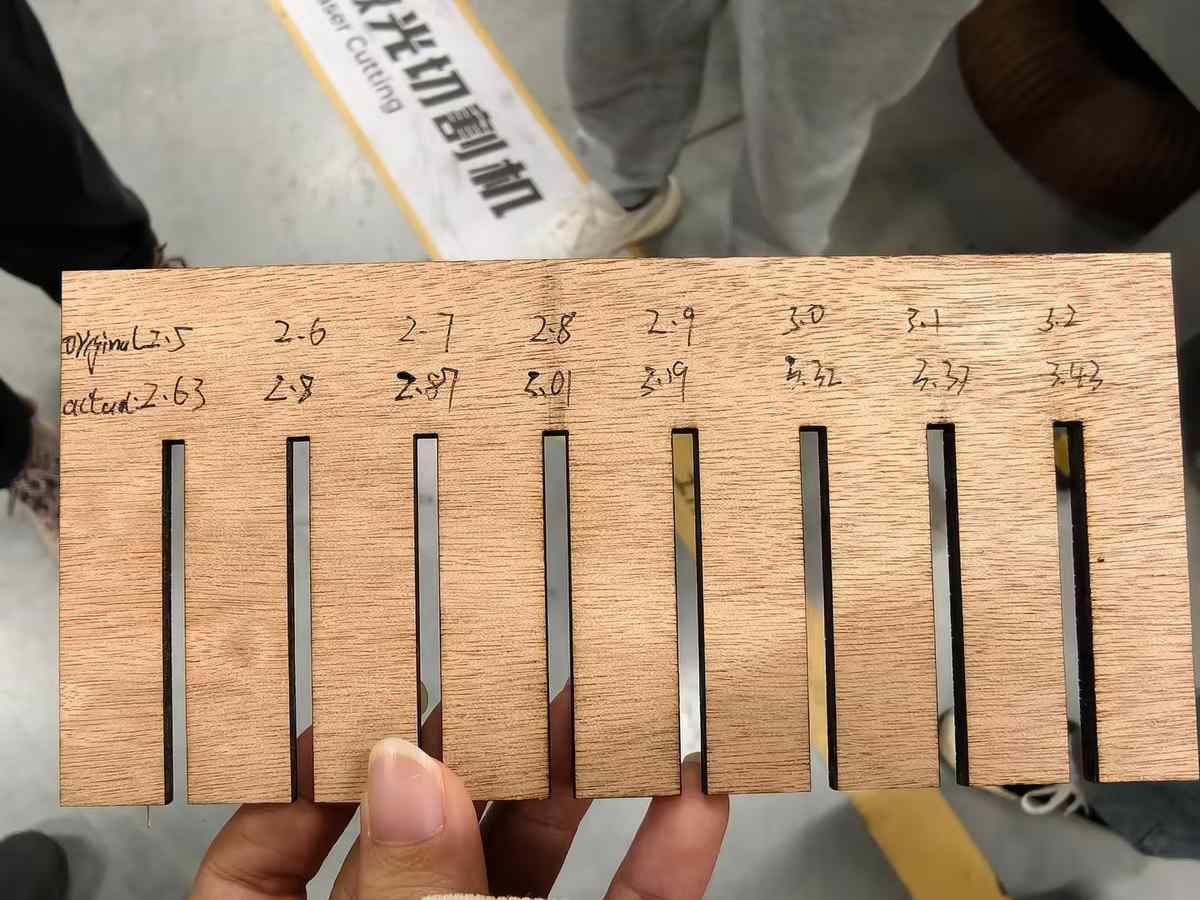
Before designing press-fit parts, we needed to understand the kerf of the laser cutter. Kerf is the small amount of material removed by the laser beam during cutting. Even though it is small, it directly affects how tightly two parts fit together.
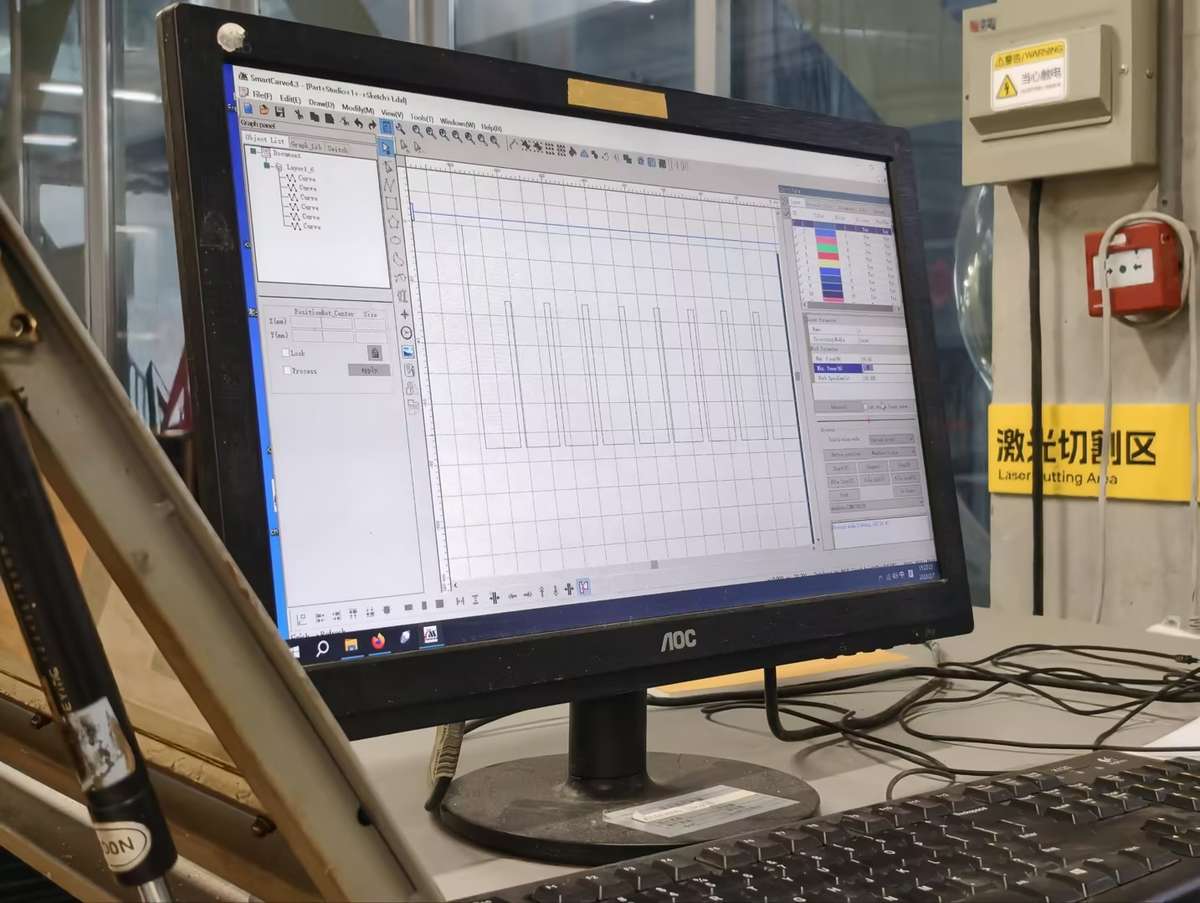
Comb design: DXF file with slots from 2.4–3.2mm (0.1mm steps) to measure kerf.
Settings (black lines, single layer):
- Max power: 80%
- Min power: 50%
- Speed: 30 mm/s Framing test confirmed material coverage. Cut took ~2 minutes—comb ejected cleanly, no burns.
Kerf Measurement We cut combs and tested fits:
- Material thickness: 5.9mm (caliper average from 10 strips).
- Snug fit at 2.75mm slot (actual width post-kerf: ~6.0mm).
- Kerf: 0.15mm (slot + 2×kerf radius ≈ thickness). Range across tests: 0.12–0.20mm. This matches typical CO2 lasers on wood; slower speeds reduce variability.
Vinyl Cutter Introduction Quick test on Cricut machine (via Cricut Design Space):
- Imported simple vector (e.g., logo sticker).
- Vinyl sheet loaded, pressure roller set to medium.
- Cut in 10 seconds; weeded cleanly. Basic but precise for decals. More in future weeks.
Individual Prototype: "Fu + Screen" Panel
Design Goal
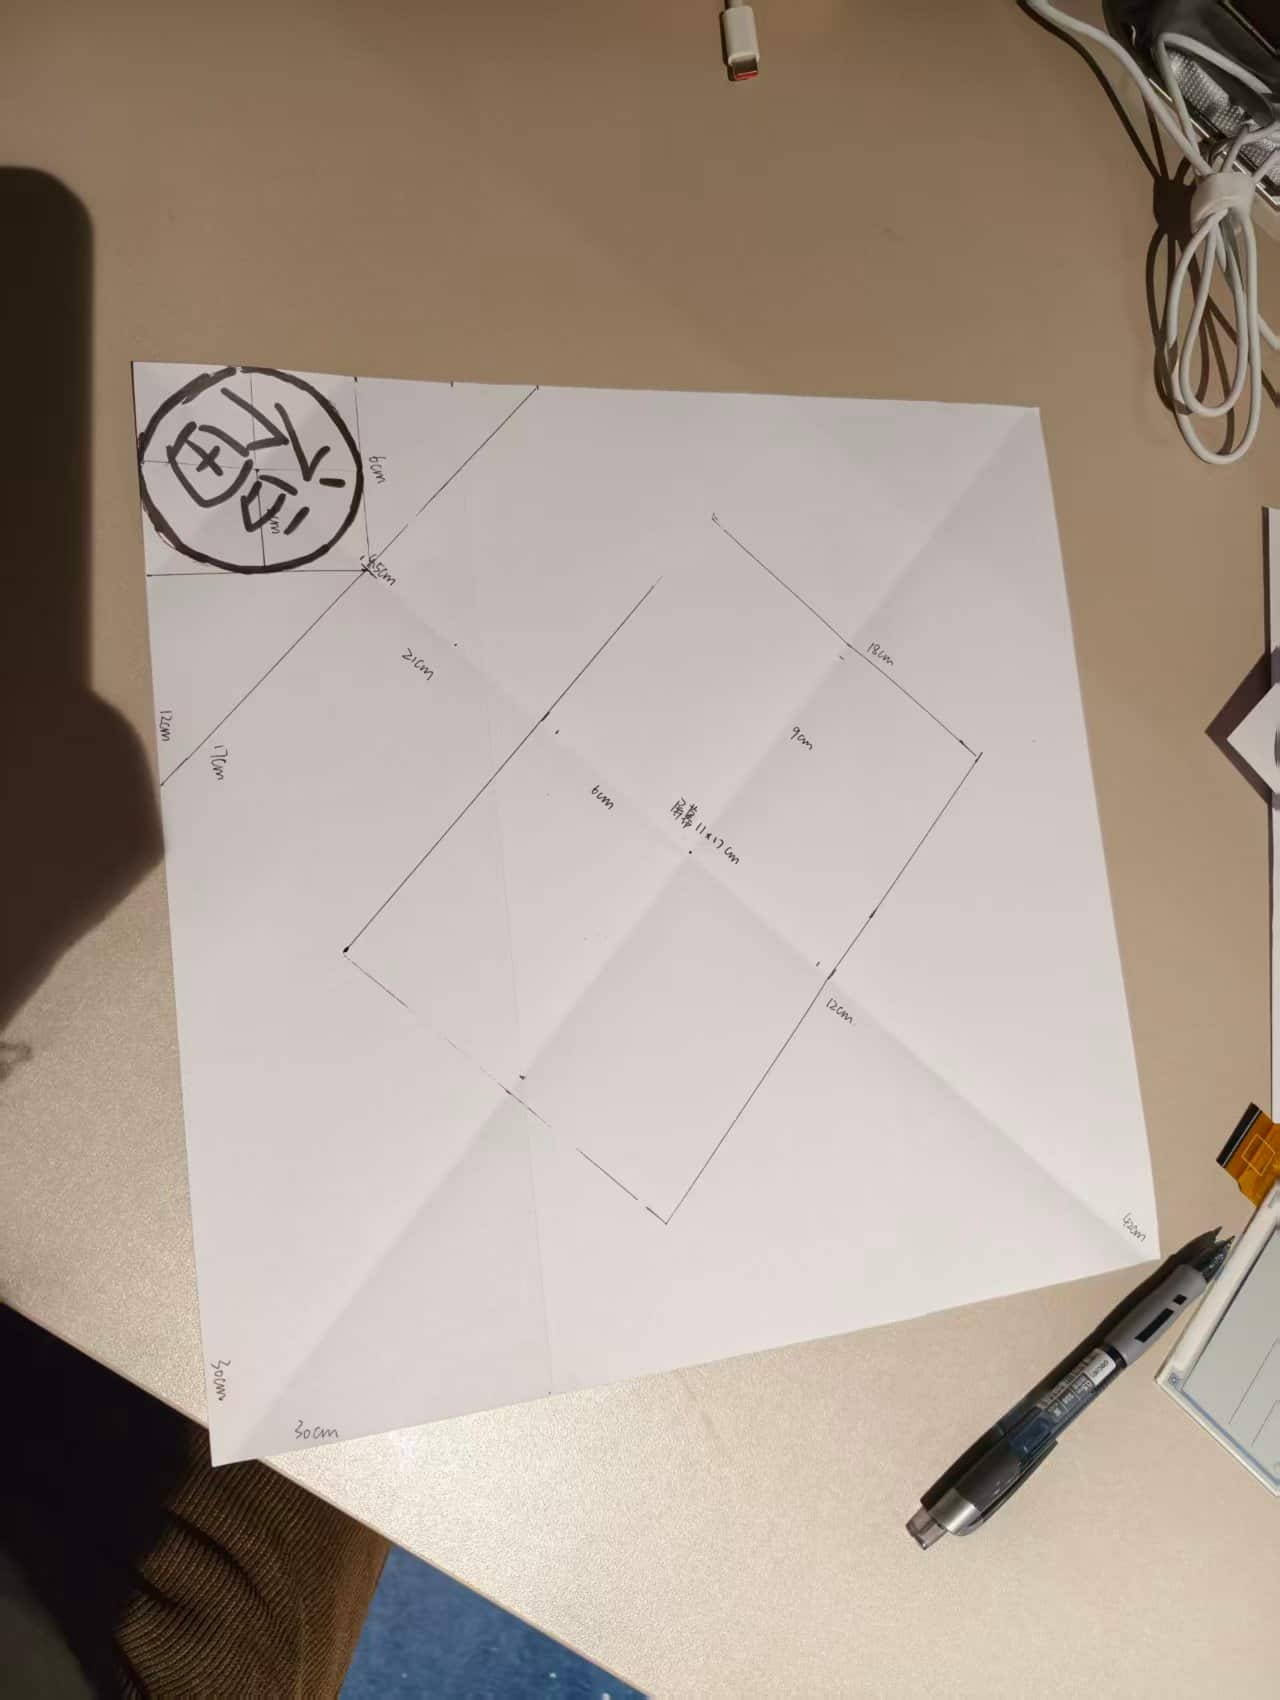
For my individual assignment, I wanted to prototype the front panel of a future electronics box for my final project.
The main visual idea comes from the traditional Chinese Fu character decoration. In daily life, Fu is often displayed in a square or diamond shape, usually between 300 mm and 600 mm wide.
I decided to start with the smallest practical version and turn it into a functional front panel. My idea was to combine cultural decoration with an electronics interface:
- the outer shape would reference the traditional Fu decoration
- the inner rectangular opening would hold a screen
- the screen could later display the Fu character, weather, date, or other information
- a small circular hole would be reserved for a button or switch
- a top hole could be used later for hanging or mounting
First Design Attempt
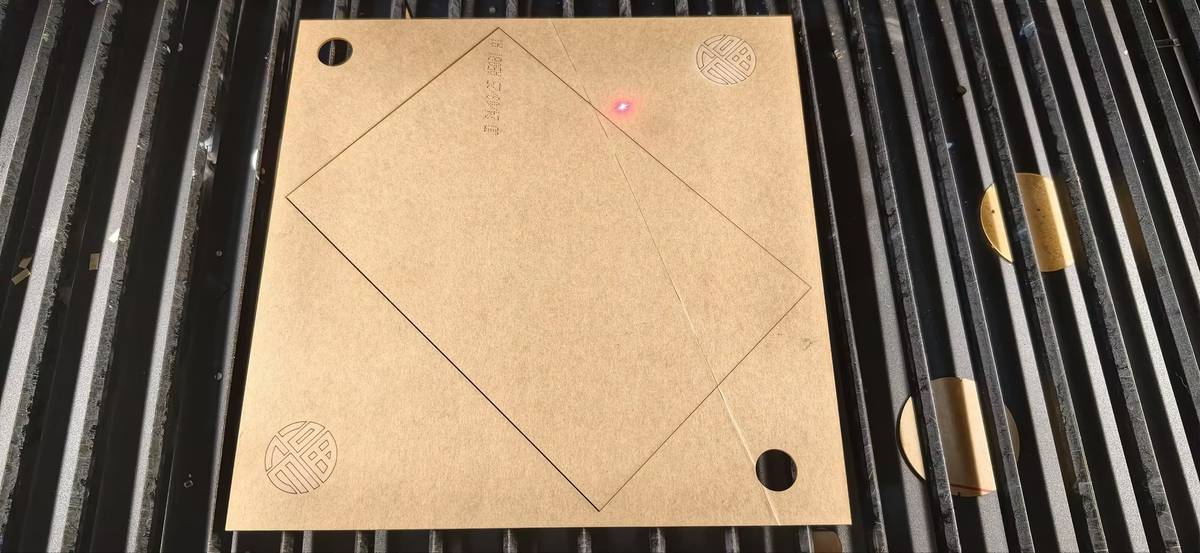
My first design was about 300 x 300 mm. I placed two decorative Fu elements beside the inner screen window, and added a circular hole above the rectangle. At this stage, I was mainly testing whether the layout could be cut cleanly and whether the different functional areas were positioned reasonably.
First Cutting Test: Chaihuo Dazu Laser
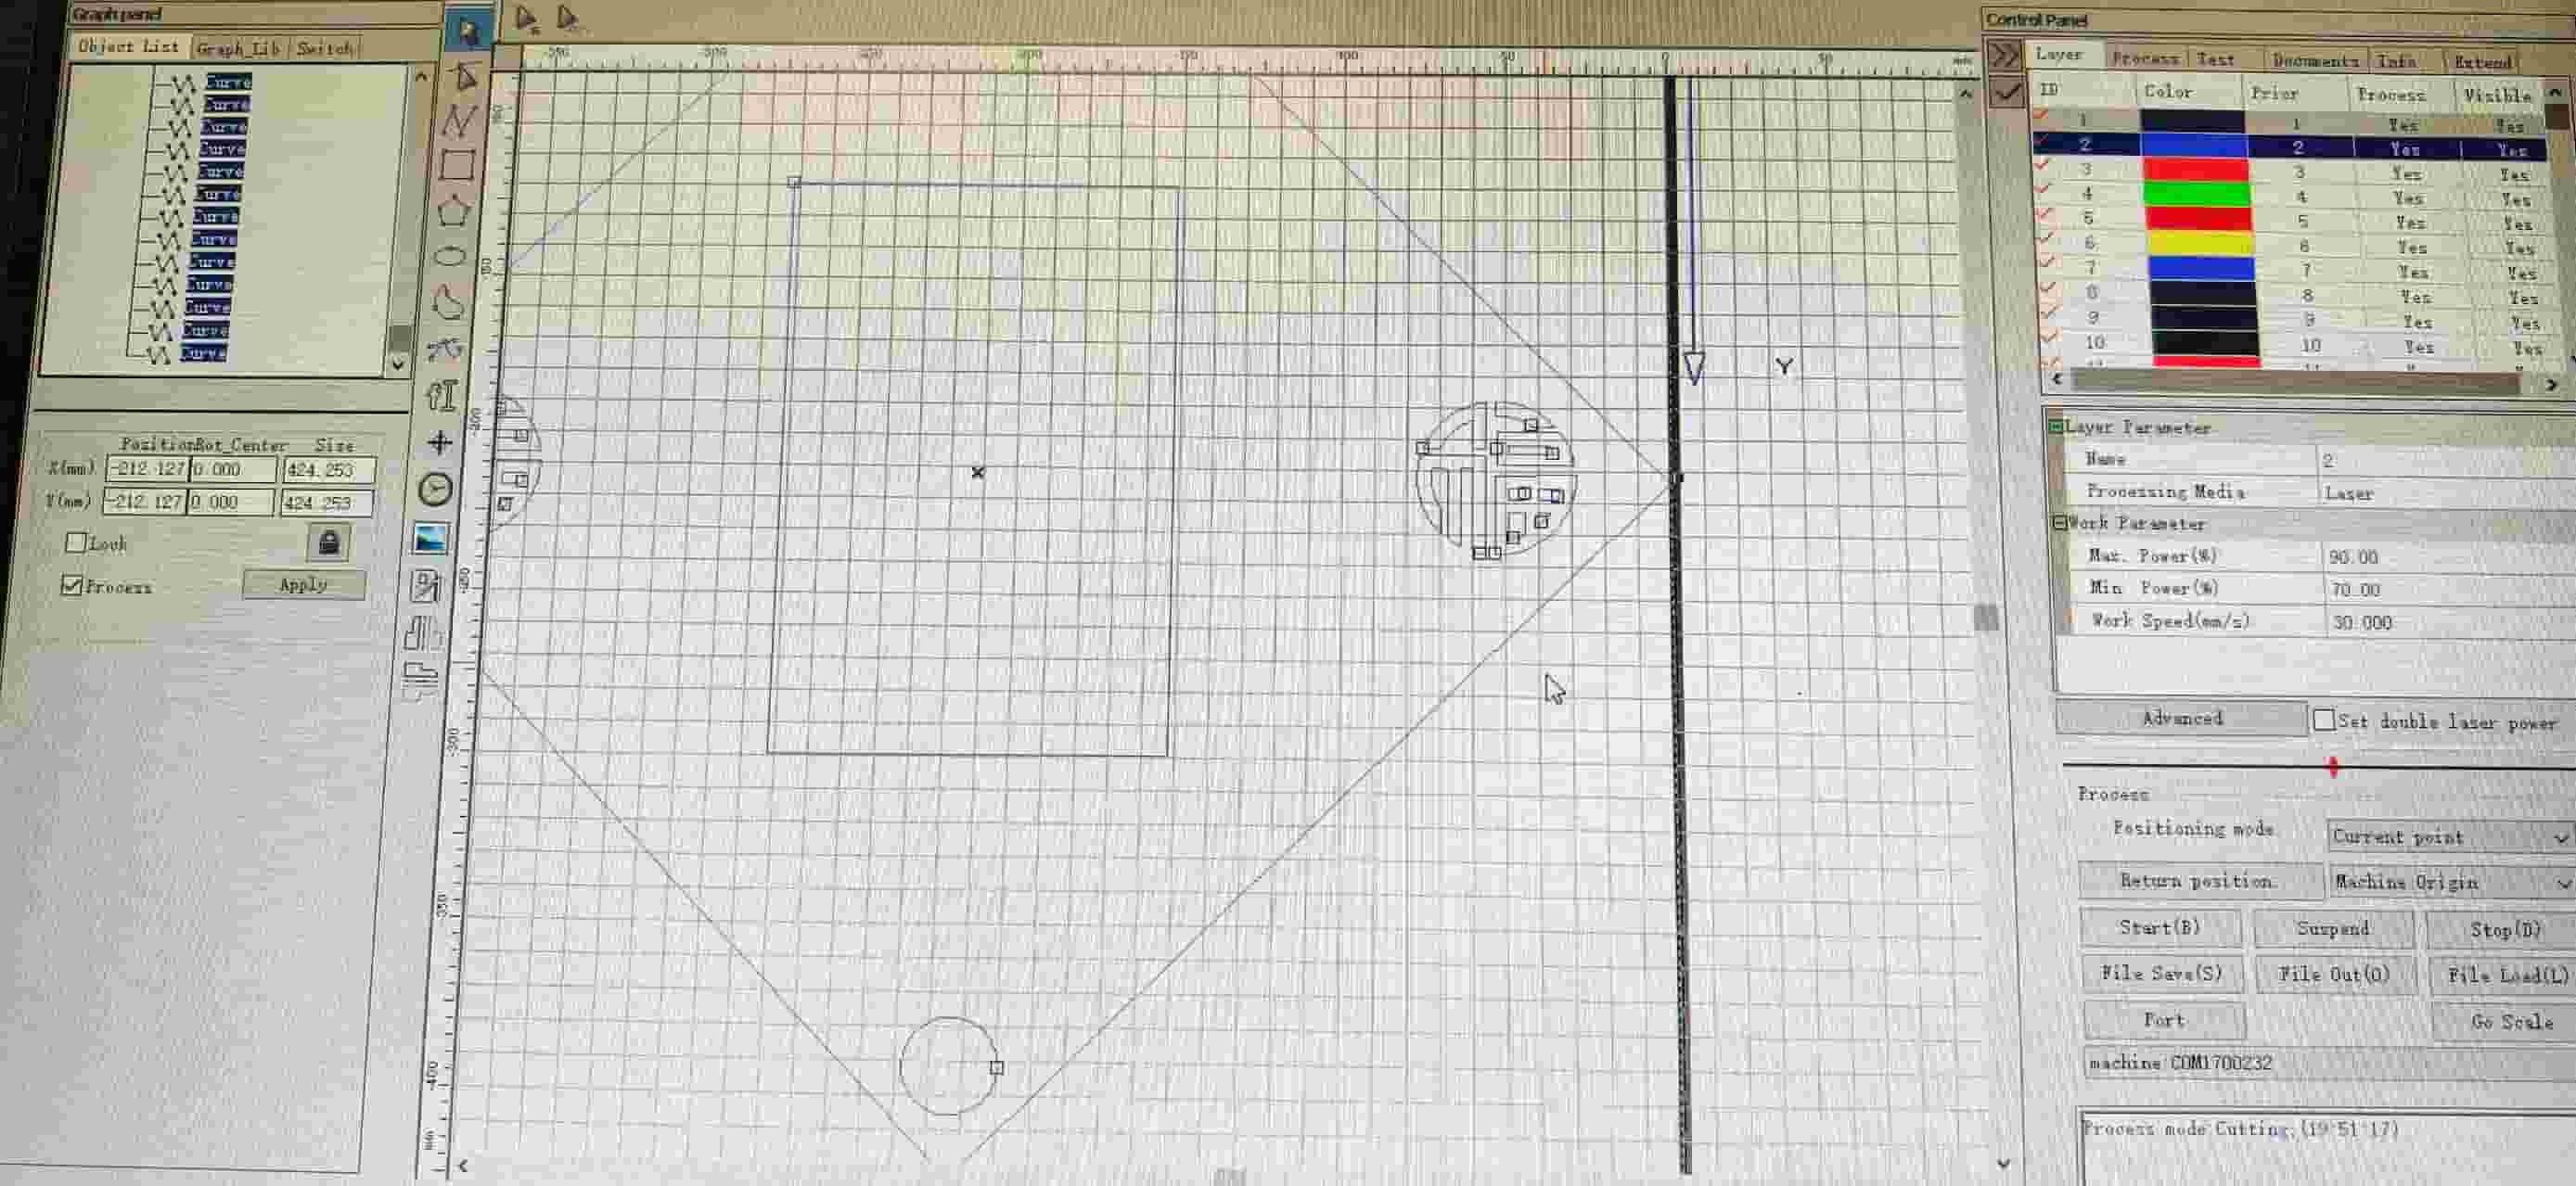
I first tested the design at Chaihuo Makerspace using the Dazu laser cutter and SmartCarve 4.3.
Material
- 6 mm waste wood
File
- DXF imported into SmartCarve 4.3
Layer settings
- Fu characters for engraving: Max Power
50%, Min Power30%, Speed30 mm/s - outer frame, circles, and rectangles for cutting: Max Power
90%, Min Power70%, Speed30 mm/s
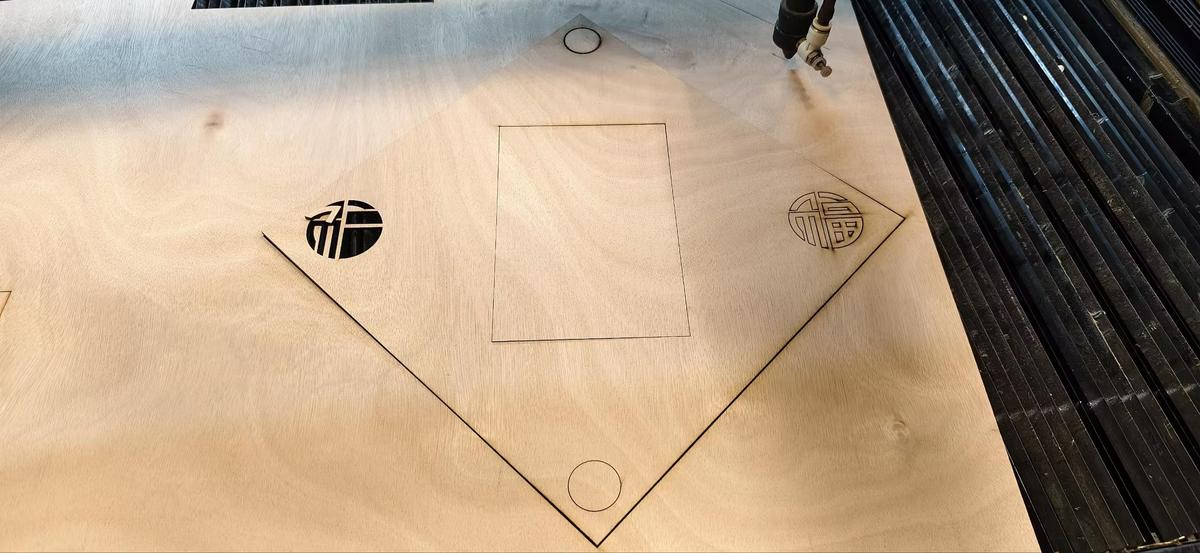
Result of the First Test
The result was only partly successful:
- the engraved Fu characters came out clearly
- the button holes were cut cleanly
- the outer frame did not cut through completely
- only two sides were fully cut, while the other two sides were left as shallow score lines
This meant the decorative and small internal features worked better than the large outer cut.
What Might Have Gone Wrong
After this failed cut, I discussed it with Emily and tried adjusting the settings again.
Debugging ideas
- Emily suggested increasing the settings to
95% / 75% - I repeated the cut, but the result was still inconsistent
At that point, I thought the problem might be caused by one or more of these factors:
- the wood was too thick for a reliable single-pass cut
- the board surface was not perfectly flat
- the laser focus may not have been fully consistent across the whole area
- the larger frame cut may have been more sensitive than the smaller holes and engraving
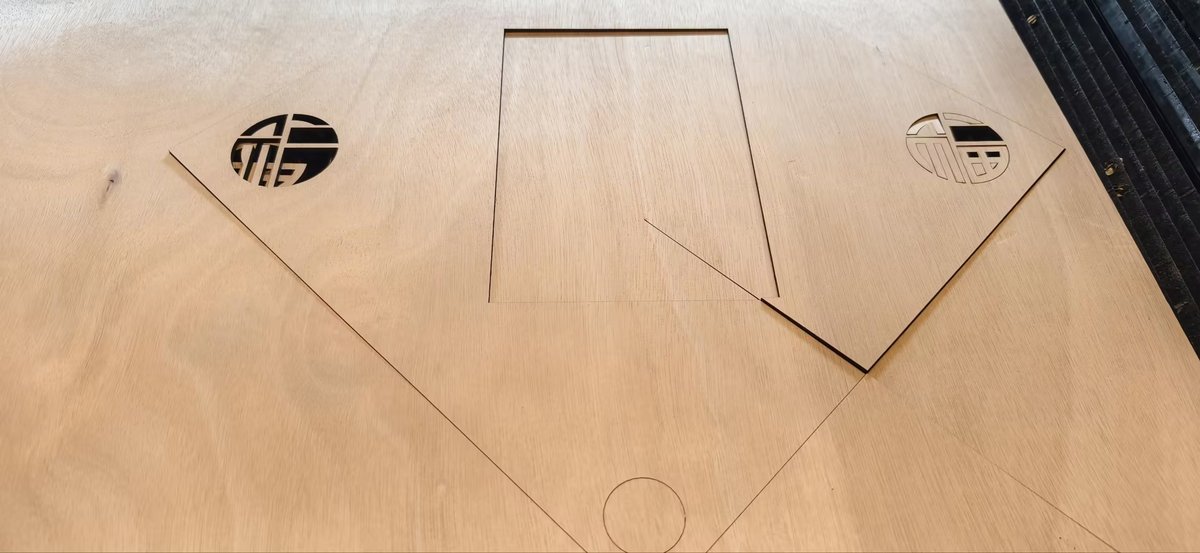
Unfortunately, the laser was broken, and our manager decided to purchase a new one and may need to wait some time.
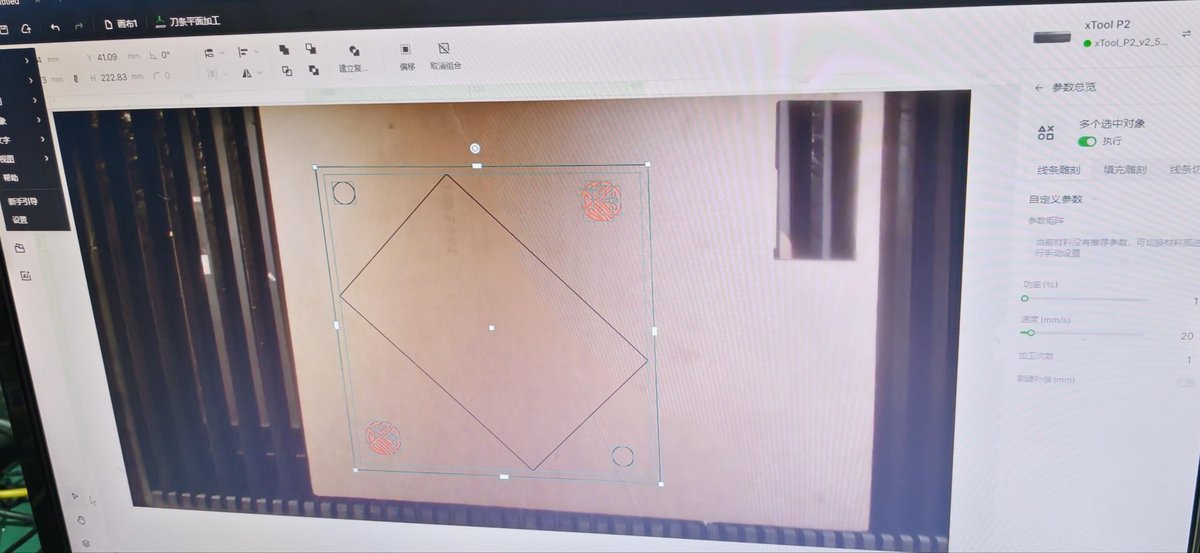
Second Test: Seeed xTool Laser
For the second attempt, I changed both the material and the machine.
I used the Seeed xTool laser and made several adjustments:
- scaled the design down to
220 x 220 mm - moved the inner rectangle slightly away from the outer edges
- added about
10 mmmore margin to improve cutting reliability - changed the material from 6 mm wood to 2 mm acrylic
Material
- 2 mm acrylic
Settings
- Max Power
60% - Min Power
40% - Speed
25 mm/s
Result of the Second Test
This time, the cut was successful.
- the edges were smooth
- the cut went through completely
- the full panel finished in about 20 seconds
- the final shape looked much cleaner and more precise
The main limitation was the smaller machine bed, which meant I had to reduce the panel size.
What I Learned
This prototype helped me understand that cutting results depend not only on the file design, but also on the relationship between:
- material thickness
- machine power
- speed
- focus
- flatness of the material
- spacing and margins in the design
I also learned that when a large frame fails but smaller details succeed, the issue is often not the design itself, but the cutting condition or material setup.
Next Step
For the next version, I want to:
- build the full box structure, not only the front panel
- test stronger and more suitable materials for the final object
- refine the decorative pattern around the screen
- add space for the real screen, switches, and electronics
- explore traditional motifs such as cloud patterns to make the design more personal